Q.1.(a)
A.1.(a) XML:-
- Xml (eXtensible Markup Language) is a mark up language.
- XML is designed to store and transport data.
- Xml was released in late 90’s. it was created to provide an easy to use and store self describing data.
- XML became a W3C Recommendation on February 10, 1998.
- XML is not a replacement for HTML.
- XML is designed to be self-descriptive.
- XML is designed to carry data, not to display data.
- XML tags are not predefined. You must define your own tags.
- XML is platform independent and language independent.
DTD:-
DTD stands for Document Type Definition. It defines the legal building blocks of an XML document. It is used to define document structure with a list of legal elements and attributes.
Purpose of DTD
Its main purpose is to define the structure of an XML document. It contains a list of legal elements and define the structure with the help of them.
Create an XML file containing some directory data
<?xml version="1.0" encoding="UTF-8"?>
<phonebook xmlns:xsi="http://www.w3.org/2001/XMLSchema-instance" xsi:
noNamespaceSchemaLocation="file:/Volumes/VST/XML/phonebook.xsd">
    <department>
        <deptname>Sales</deptname>
        <deptphone>706.542.3700</deptphone>
        <deptfax>706.542.3743</deptfax>
        <deptemail>sales@yourbiz.com</deptemail>
        <employee>
            <empid>18890</empid>
            <empfname>James</empfname>
            <emplname>Smith</emplname>
            <empphone>706.542.3702</empphone>
            <empemail>jsmith@yourbix.com</empemail>
        </employee>
        <employee>
            <empid>18990</empid>
            <empfname>Joanna</empfname>
            <emplname>Smart</emplname>
            <empphone>706.542.3703</empphone>
            <empemail>jsmart@yourbix.com</empemail>
        </employee>
        <employee>
            <empid>18732</empid>
            <empfname>Mary</empfname>
            <emplname>Hunt</emplname>
            <empphone>706.542.3704</empphone>
            <empemail>mhunt@yourbix.com</empemail>
        </employee>
    </department>
</phonebook>

Create a data schema for a credit card statement
<?xml version="1.0" encoding="UTF-8"?>
<xsd:schema xmlns:xsd="http://www.w3.org/2001/XMLSchema">
    <xsd:element name="creditcard">
        <xsd:complexType>
            <xsd:sequence>
                <xsd:element maxOccurs="unbounded" minOccurs="1" name="card" type="cardType"/>
            </xsd:sequence>
        </xsd:complexType>
    </xsd:element>
    <xsd:complexType name="cardType">
        <xsd:sequence>
            <xsd:element name="cardnum" type="xsd:string"/>
            <xsd:element name="cardfname" type="xsd:string"/>
            <xsd:element name="cardlname" type="xsd:string"/>
            <xsd:element name="cardaddress" type="xsd:string"/>
            <xsd:element name="cardlimit" type="xsd:integer"/>
            <xsd:element maxOccurs="unbounded" minOccurs="0" name="prereqid" type="xsd:string"/>
            <xsd:element maxOccurs="unbounded" minOccurs="1" name="cardstatement" type="statementType"/>
        </xsd:sequence>
    </xsd:complexType>
    <xsd:complexType name="statementType">
        <xsd:sequence>
            <xsd:element name="statementid" type="xsd:integer"/>
            <xsd:element name="statementdate" type="xsd:date"/>
            <xsd:element maxOccurs="unbounded" minOccurs="1" name="statementcharge" type="chargeType"/>
        </xsd:sequence>
    </xsd:complexType>
    <xsd:complexType name="chargeType">
        <xsd:sequence>
            <xsd:element name="chargeid" type="xsd:string"/>
            <xsd:element name="chargeamount" type="xsd:decimal"/>
            <xsd:element name="chargedate" type="xsd:date"/>
            <xsd:element name="chargebusiness" type="xsd:string"/>
        </xsd:sequence>
    </xsd:complexType>
</xsd:schema>
Q.1.(b)
A.1.(b) Overview of XML:-
XML is a simple text based language which was designed to store and transport data in plain text format. It stands for Extensible Markup Language. Following are some of the salient features of XML.
- XML is a markup language.
- XML is a tag based language like HTML.
- XML tags are not predefined like HTML.
- You can define your own tags which is why it is called extensible language.
- XML tags are designed to be self descriptive.
- XML is W3C Recommendation for data storage and transport.
Example
<?xml version="1.0"?>
<Class>
<Name>First</Name>
<Sections>
<Section>
<Name>A</Name>
<Students>
<Student>Rohan</Student>
<Student>Mohan</Student>
<Student>Sohan</Student>
<Student>Lalit</Student>
<Student>Vinay</Student>
</Students>
</Section>
<Section>
<Name>B</Name>
<Students>
<Student>Robert</Student>
<Student>Julie</Student>
<Student>Kalie</Student>
<Student>Michael</Student>
</Students>
</Section>
</Sections>
</Class>
Advantages
Following are the advantages that XML provides:
- Technology agnostic - Being plain text, XML is technology independent. It can be used by any technology for data storage and transmission purpose.
- Human readable- XML uses simple text format. It is human readable and understandable.
- Extensible - in XML, custom tags can be created and used very easily.
- Allow Validation - Using XSD, DTD and XML structure can be validated easily.
Disadvantages
Following are the disadvantages of XML usage:
- Redundant Syntax - Normally XML file contains lot of repeatitive terms.
- Verbose-Being a verbose language, XML file size increases the transmission and storage costs.
XML Parsing:-
Parsing XML refers to going through XML document to access data or to modify data in one or other way.
XML Parser?
XML Parser provides way how to access or modify data present in an XML document. Java provides multiple options to parse XML document. Following are various types of parsers which are commonly used to parse XML documents.
- Dom Parser - Parses the document by loading the complete contents of the document and creating its complete hiearchical tree in memory.
- SAX Parser - Parses the document on event based triggers. Does not load the complete document into the memory.
- JDOM Parser - Parses the document in similar fashion to DOM parser but in more easier way.
- StAX Parser - Parses the document in similar fashion to SAX parser but in more efficient way.
- XPath Parser - Parses the XML based on expression and is used extensively in conjuction with XSLT.
- DOM4J Parser - A java library to parse XML, XPath and XSLT using Java Collections Framework , provides support for DOM, SAX and JAXP.

- XML Parsing Process

Q.2.(a)
A.2.(a)


Q.2.(b)
A.2.(b)
Java Database Connectivity(JDBC) is an Application Programming Interface(API) used to connect Java application with Database. JDBC is used to interact with various type of Database such as Oracle, MS Access, My SQL and SQL Server. JDBC can also be defined as the platform-independent interface between a relational database and Java programming. It allows java program to execute SQL statement and retrieve result from database.

JDBC Driver is required to process SQL requests and generate result. The following are the different types of driver available in JDBC.
- Type-1 Driver or JDBC-ODBC bridge
- Type-2 Driver or Native API Partly Java Driver
- Type-3 Driver or Network Protocol Driver
- Type-4 Driver or Thin Driver
JDBC-ODBC bridge
Type-1 Driver act as a bridge between JDBC and other database connectivity mechanism(ODBC). This driver converts JDBC calls into ODBC calls and redirects the request to the ODBC driver.

Required Steps
The following steps are required to create a new Database using JDBC application −
Import the packages: Requires that you include the packages containing the JDBC classes needed for database programming. Most often, using import java.sql.* will suffice.
Register the JDBC driver: Requires that you initialize a driver so you can open a communications channel with the database.
Open a connection: Requires using the DriverManager.getConnection() method to create a Connection object, which represents a physical connection with a database server.
Execute a query: Requires using an object of type Statement for building and submitting an SQL statement to select (i.e. fetch ) records from a table.
Extract Data: Once SQL query is executed, you can fetch records from the table.
Clean up the environment: Requires explicitly closing all database resources versus relying on the JVM's garbage collection.
Example
//STEP 1. Import required packages
import java.sql.*;
public class JDBCExample {
// JDBC driver name and database URL
static final String JDBC_DRIVER = "com.mysql.jdbc.Driver";
static final String DB_URL = "jdbc:mysql://localhost/STUDENTS";
// Database credentials
static final String USER = "username";
static final String PASS = "password";
public static void main(String[] args) {
Connection conn = null;
Statement stmt = null;
try{
//STEP 2: Register JDBC driver
Class.forName("com.mysql.jdbc.Driver");
//STEP 3: Open a connection
System.out.println("Connecting to a selected database...");
conn = DriverManager.getConnection(DB_URL, USER, PASS);
System.out.println("Connected database successfully...");
//STEP 4: Execute a query
System.out.println("Creating statement...");
stmt = conn.createStatement();
String sql = "SELECT id, first, last, age FROM Registration";
ResultSet rs = stmt.executeQuery(sql);
//STEP 5: Extract data from result set
while(rs.next()){
//Retrieve by column name
int id = rs.getInt("id");
int age = rs.getInt("age");
String first = rs.getString("first");
String last = rs.getString("last");
//Display values
System.out.print("ID: " + id);
System.out.print(", Age: " + age);
System.out.print(", First: " + first);
System.out.println(", Last: " + last);
}
rs.close();
}catch(SQLException se){
//Handle errors for JDBC
se.printStackTrace();
}catch(Exception e){
//Handle errors for Class.forName
e.printStackTrace();
}finally{
//finally block used to close resources
try{
if(stmt!=null)
conn.close();
}catch(SQLException se){
}// do nothing
try{
if(conn!=null)
conn.close();
}catch(SQLException se){
se.printStackTrace();
}//end finally try
}//end try
System.out.println("Goodbye!");
}//end main
}//end JDBCExample
Now, let us compile the above example as follows −
C:\>javac JDBCExample.java
C:\>
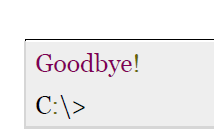
When you run JDBCExample, it produces the following result −
C:\>java JDBCExample
Connecting to a selected database...
Connected database successfully...
Creating statement...
ID: 100, Age: 18, First: Zara, Last: Ali
ID: 101, Age: 25, First: Mahnaz, Last: Fatma
ID: 102, Age: 30, First: Zaid, Last: Khan
ID: 103, Age: 28, First: Sumit, Last: Mittal
Goodbye!
C:\>
Q.3.(a)
A.3.(a)
(i)


(ii)


(iii)

(iv)
function showCheckboxes() {
var checkboxes = document.getElementById("checkboxes");
if (!expanded) {
checkboxes.style.display = "block";
expanded = true;
} else {
checkboxes.style.display = "none";
expanded = false;
}
}
.multiselect {
width: 200px;
}
.selectBox {
position: relative;
}
.selectBox select {
width: 100%;
font-weight: bold;
}
.overSelect {
position: absolute;
left: 0;
right: 0;
top: 0;
bottom: 0;
}
#checkboxes {
display: none;
border: 1px #dadada solid;
}
#checkboxes label {
display: block;
}
#checkboxes label:hover {
background-color: #1e90ff;
}
<form>
<div class="multiselect">
<div class="selectBox" onclick="showCheckboxes()">
<select>
<option>Select an option</option>
</select>
<div class="overSelect"></div>
</div>
<div id="checkboxes">
<label for="one">
<input type="checkbox" id="one" />First checkbox</label>
<label for="two">
<input type="checkbox" id="two" />Second checkbox</label>
<label for="three">
<input type="checkbox" id="three" />Third checkbox</label>
</div>
</div>
</form>
(v)

Q.3.(b)
A.3.(b)
A custom tag is a user-defined JSP language element. When a JSP page containing a custom tag is translated into a servlet, the tag is converted to operations on an object called a tag handler. The Web container then invokes those operations when the JSP page's servlet is executed.
JSP tag extensions let you create new tags that you can insert directly into a JavaServer Page just as you would the built-in tags you learned about in earlier chapter. The JSP 2.0 specification introduced Simple Tag Handlers for writing these custom tags.
To write a custom tag you can simply extend SimpleTagSupport class and override the doTag() method, where you can place your code to generate content for the tag.
Create "Hello" Tag:
Consider you want to define a custom tag named <ex:Hello> and you want to use it in the following fashion without a body:
<ex:Hello />
To create a custom JSP tag, you must first create a Java class that acts as a tag handler. So let us create HelloTag class as follows:
package com.tutorialspoint;
import javax.servlet.jsp.tagext.*;
import javax.servlet.jsp.*;
import java.io.*;
public class HelloTag extends SimpleTagSupport { public void doTag() throws JspException, IOException { JspWriter out = getJspContext().getOut(); out.println("Hello Custom Tag!");
}
}
Above code has simple coding where doTag() method takes the current JspContext object using getJspContext() method and uses it to send "Hello Custom Tag!" to the current JspWriter object.
Let us compile above class and copy it in a directory available in environment variable CLASSPATH. Finally create following tag library file: <Tomcat-Installation-Directory>webapps\ROOT\WEB-INF\custom.tld.
<taglib>
  <tlib-version>1.0</tlib-version>
  <jsp-version>2.0</jsp-version>
  <short-name>Example TLD</short-name>
  <tag>
    <name>Hello</name>
    <tag-class>com.tutorialspoint.HelloTag</tag-class>
    <body-content>empty</body-content>
  </tag>
</taglib>
Now it's time to use above defined custom tag Hello in our JSP program as follows:
<%@ taglib prefix="ex" uri="WEB-INF/custom.tld"%>
<html>
  <head>
    <title>A sample custom tag</title>
  </head>
  <body>
    <ex:Hello/>
  </body>
</html>
Try to call above JSP and this should produce following result:
Hello Custom Tag!
Accessing the Tag Body:
You can include a message in the body of the tag as you have seen with standard tags. Consider you want to define a custom tag named <ex:Hello> and you want to use it in the following fashion with a body:
<ex:Hello>
   This is message body
</ex:Hello>
Let us make following changes in above our tag code to process the body of the tag:
package com.tutorialspoint;

import javax.servlet.jsp.tagext.*;
import javax.servlet.jsp.*;
import java.io.*;

public class HelloTag extends SimpleTagSupport {

   StringWriter sw = new StringWriter();
   public void doTag()
      throws JspException, IOException
    {
       getJspBody().invoke(sw);
       getJspContext().getOut().println(sw.toString());
    }

}
In this case, the output resulting from the invocation is first captured into a StringWriter before being written to the JspWriter associated with the tag. Now accordingly we need to change TLD file as follows:
<taglib>
  <tlib-version>1.0</tlib-version>
  <jsp-version>2.0</jsp-version>
  <short-name>Example TLD with Body</short-name>
  <tag>
    <name>Hello</name>
    <tag-class>com.tutorialspoint.HelloTag</tag-class>
    <body-content>scriptless</body-content>
  </tag>
</taglib>
Now let us call above tag with proper body as follows:
<%@ taglib prefix="ex" uri="WEB-INF/custom.tld"%>
<html>
  <head>
    <title>A sample custom tag</title>
  </head>
  <body>
    <ex:Hello>
        This is message body
    </ex:Hello>
  </body>
</html>
This will produce following result:
This is message body
Custom Tag Attributes:
You can use various attributes along with your custom tags. To accept an attribute value, a custom tag class needs to implement setter methods, identical to JavaBean setter methods as shown below:
package com.tutorialspoint;

import javax.servlet.jsp.tagext.*;
import javax.servlet.jsp.*;
import java.io.*;

public class HelloTag extends SimpleTagSupport {

   private String message;

   public void setMessage(String msg) {
      this.message = msg;
   }

   StringWriter sw = new StringWriter();

   public void doTag()
      throws JspException, IOException
    {
       if (message != null) {
          /* Use message from attribute */
          JspWriter out = getJspContext().getOut();
          out.println( message );
       }
       else {
          /* use message from the body */
          getJspBody().invoke(sw);
          getJspContext().getOut().println(sw.toString());
       }
   }

}
The attribute's name is "message", so the setter method is setMessage(). Now let us add this attribute in TLD file using <attribute> element as follows:
<taglib>
  <tlib-version>1.0</tlib-version>
  <jsp-version>2.0</jsp-version>
  <short-name>Example TLD with Body</short-name>
  <tag>
    <name>Hello</name>
    <tag-class>com.tutorialspoint.HelloTag</tag-class>
    <body-content>scriptless</body-content>
    <attribute>
       <name>message</name>
    </attribute>
  </tag>
</taglib>
Now let us try following JSP with message attribute as follows:
<%@ taglib prefix="ex" uri="WEB-INF/custom.tld"%>
<html>
  <head>
    <title>A sample custom tag</title>
  </head>
  <body>
    <ex:Hello message="This is custom tag" />
  </body>
</html>
This will produce following result:
This is custom tag
Q.4.
A.4.


Q.5.
A.5.
Security Implementation Mechanisms
The characteristics of an application should be considered when deciding the layer and type of security to be provided for applications. The following sections discuss the characteristics of the common mechanisms that can be used to secure Java EE applications. Each of these mechanisms can be used individually or with others to provide protection layers based on the specific needs of your implementation.Java SE Security Implementation Mechanisms
Java SE provides support for a variety of security features and mechanisms, including:- Java Authentication and Authorization Service (JAAS): JAAS is a set of APIs that enable services to authenticate and enforce access controls upon users. JAAS provides a pluggable and extensible framework for programmatic user authentication and authorization. JAAS is a core Java SE API and is an underlying technology for Java EE security mechanisms.
- Java Generic Security Services (Java GSS-API): Java GSS-API is a token-based API used to securely exchange messages between communicating applications. The GSS-API offers application programmers uniform access to security services atop a variety of underlying security mechanisms, including Kerberos.
- Java Cryptography Extension (JCE): JCE provides a framework and implementations for encryption, key generation and key agreement, and Message Authentication Code (MAC) algorithms. Support for encryption includes symmetric, asymmetric, block, and stream ciphers. Block ciphers operate on groups of bytes while stream ciphers operate on one byte at a time. The software also supports secure streams and sealed objects.
- Java Secure Sockets Extension (JSSE): JSSE provides a framework and an implementation for a Java version of the SSL and TLS protocols and includes functionality for data encryption, server authentication, message integrity, and optional client authentication to enable secure Internet communications.
- Simple Authentication and Security Layer (SASL): SASL is an Internet standard (RFC 2222) that specifies a protocol for authentication and optional establishment of a security layer between client and server applications. SASL defines how authentication data is to be exchanged but does not itself specify the contents of that data. It is a framework into which specific authentication mechanisms that specify the contents and semantics of the authentication data can fit.
Java EE Security Implementation Mechanisms
Java EE security services are provided by the component container and can be implemented using declarative or programmatic techniques (container security is discussed more in Securing Containers). Java EE security services provide a robust and easily configured security mechanism for authenticating users and authorizing access to application functions and associated data at many different layers. Java EE security services are separate from the security mechanisms of the operating system.Application-Layer Security
In Java EE, component containers are responsible for providing application-layer security. Application-layer security provides security services for a specific application type tailored to the needs of the application. At the application layer, application firewalls can be employed to enhance application protection by protecting the communication stream and all associated application resources from attacks.Java EE security is easy to implement and configure, and can offer fine-grained access control to application functions and data. However, as is inherent to security applied at the application layer, security properties are not transferable to applications running in other environments and only protect data while it is residing in the application environment. In the context of a traditional application, this is not necessarily a problem, but when applied to a web services application, where data often travels across several intermediaries, you would need to use the Java EE security mechanisms along with transport-layer security and message-layer security for a complete security solution.
The advantages of using application-layer security include the following:
- Security is uniquely suited to the needs of the application.
- Security is fine-grained, with application-specific settings.
- The application is dependent on security attributes that are not transferable between application types.
- Support for multiple protocols makes this type of security vulnerable.
- Data is close to or contained within the point of vulnerability.
Example
public void service(HttpServletRequest request, HttpServletResponseresponse)
throws IOException, ServletException
{
// check to see if a session has already been created for this user
// don't create a new session yet.
HttpSession session = request.getSession( false);
String requestedPage = request.getParameter(Constants.REQUEST);
if ( session != null)
{
// retrieve authentication parameter from the session
Boolean isAuthenticated = (Boolean)
session.getValue(Constants.AUTHENTICATION);
// if the user is not authenticated
if ( !isAuthenticated.booleanValue() )
{
// process the unauthenticated request
unauthenticatedUser(response, requestedPage);
}
}
else // the session does not exist
{
// therefore the user is not authenticated
// process the unauthenticated request
unauthenticatedUser(response, requestedPage);
}
}
Q.6.(a)
A.6.(a)
Basic Concepts
Before going into details about implementing EJBs, some basic concepts must be clarified. First of all, recall that a bean runs in a container. The container, which is part of the EJB server, provides a number of services to the bean. These include transaction services, synchronization services, and security.
To provide these services, the bean container must be able to intercept calls to bean methods. For example, a client application calls a bean method that has a transaction attribute that requires the bean to create a new transaction context. The bean container must be able to interpose code to start a new transaction before the method call, and to commit the transaction, if possible, when the method completes, and before any values are returned to the client.
For this reason and others, a client application does not call the remote bean methods directly. Instead, the client invokes the bean method through a two-step process, mediated by the ORB and by the container.
First, the client actually calls a local proxy stub for the remote method. The stub marshalls any parameter data, and then calls a remote skeleton on the server. The skeleton unmarshalls the data, and upcalls to the bean container. This step is required because of the remote nature of the call. Note that this step is completely transparent both to the client application developer as well as to the bean developer. It is a detail that you do not need to know about to write your application code, either on the client or the server. Nevertheless, it is useful to know what is going on, especially when it comes to understanding what happens during bean deployment.
In the second step, the bean container gets the skeleton upcall, then interposes whatever services are required by the context. These can include:
- authenticating the client, on the first method call
- performing transaction management
- calling synchronization methods in the bean itself
- identity checks and switch
The container then delegates the method call to the bean. The bean method executes. When it returns, the thread of control returns to the bean container, which interposes whatever services are required by the context. For example, if the method is running in a transaction context, the bean container performs a commit operation, if possible. This depends on the transaction attributes in the bean descriptor.
Then the bean container calls the skeleton, which marshalls return data, and returns it to the client stub.
These steps are completely invisible to client-side and server-side application developers. One of the major advantages of the EJB development model is that it hides the complexity of transaction and identity management from developers.
The Home Interface
When a client needs to create a bean instance, it does so through the home interface. The home interface specifies one or more
create() methods. A create() method can takes parameters, that are passed in from the client when the bean is created.
For each create method in the home interface, there must be a corresponding method called
ejbCreate() specified in the remote interface, with the same signature. The only difference is that create() is specified to return the bean type, while ejbCreate() is a void method. When a client invokes create() on the home, the container interposes whatever services are required at that point, and then calls the corresponding ejbCreate() method in the bean itself.
A reference to the home object is what gets published in the database by the
deployejb tool. . This is the object that the client looks up to create instances of the bean.The Remote Interface
The bean developer writes a remote interface for each EJB in the application. The remote interface specifies the business methods that the bean contains. Each method in the bean that the client is to have access to must be specified in the remote interface. Private methods in the bean are not specified in the remote interface.
The signature for each method in the remote interface must match the signature in the bean implementation.
(PL/SQL developers will recognize that the remote interface is much like a package spec, and the remote interface implementation is akin to the package body. However, the remote interface does not declare public variables. It declares only the methods that are implemented by the bean.)
The remote interface must be public, and it must subclass
javax.ejb.EJBObject. For example, you could write a remote interface for an employeeManagement bean as follows:public interface employeeManagement extends javax.ejb.EJBObject {
public void hire(int empNumber, String startDate, double salary)
throws java.rmi.RemoteException;
public double getCommission(int empNumber) throws java.rmi.RemoteException;
// empRecord is a class that is defined separately as part of the bean
public empRecord getEmpInfo(int empNumber) throws java.rmi.RemoteException;
...
}
All methods in the remote interface are declared as throwing
RemoteException. This is the usual mechanism for notifying the client of runtime errors in the bean. However, the bean container can throw other exceptions, such as SQLException. Any exception can be thrown to the client, as long as it is serializable.
Runtime exceptions are transferred back to the client as a remote runtime exception. These contain the stack trace of the remote exception.
Accessing the Bean Methods
You get access to a bean so that you can invoke its methods in a two-step process. First, you look up the bean home interface, which is published in the Oracle8i database as part of the bean deployment process. You use the Java Naming and Directory Interface (JNDI) to look up the home interface. Then, using the home interface, you create instances of the bean in the server. For those who know CORBA, the bean home interface is acting very much like a CORBA factory object, able to produce new CORBA objects on demand.
Once you have the home interface, and then the bean reference returned by the home interface
create() method, you call the bean methods using the normal Java syntax: bean.method().
As a quick first example, suppose that
myBeanHome is a reference that you have obtained to the home interface of a bean called myBean. myBean must have at least one create() method, that lets you instantiate the bean. So you create a new instance of the bean on the remote server by coding:myBean home =
(myBean) initialContext.lookup(URL); // get the home interface using JNDI
myBean tester = home.create(); // create a new bean of type myBean
and then call myBean's methods using the usual syntax
tester.method1(p1, p2);
Components of EJB :-
- EJB server(s)
- EJB container(s)
- Enterprise Beans
- EJB clients
- other auxillary systems (e.g. Java Naming and Directory Interface (JNDI) server, Java Transaction Service (JTS), ...).

Q.6.(b)
A.6(b)
Entity Beans actually represents the data in a database. It is not that Entity Beans replaces JDBC API. There are two types of Entity Beans Container Managed and Bean Managed. In Container Managed Entity Bean - Whenever the instance of the bean is created the container automatically retrieves the data from the DB/Persistence storage and assigns to the object variables in bean for user to manipulate or use them. For this the developer needs to map the fields in the database to the variables in deployment descriptor files (which varies for each vendor). In the Bean Managed Entity Bean - The developer has to specifically make connection, retrieve values, assign them to the objects in the ejbLoad() which will be called by the container when it instantiates a bean object. Similarly in the ejbStore() the container saves the object values back the persistence storage. ejbLoad and ejbStore are callback methods and can be only invoked by the container. Apart from this, when you use Entity beans you don’t need to worry about database transaction handling, database connection pooling etc. which are taken care by the ejb container.
Advantages of Entity Beans :-
EJB provide developers architectural independence
EJB insulates developers from the underlying middleware, since the only environment an EJB developer sees is the Java environment. It also helps the EJB server/container vendor to change and make improvements on the underlying middleware layer without affecting a user’s existing enterprise applications.
¨ WORA for server side components
Since EJB is based on Java technology, both the developer and the user are guaranteed that their components are Write Once, Run Anywhere (WORA). As long as an EJB Server faithfully conforms to the EJB specification, any EJB application should run within that server.
¨ EJB establishes Roles for Application Development
The EJB specification assigns specific roles for project participants charged with enterprise application development utilizing EJB.
The server vendor can take care of providing support for complex system services and make available an organized framework for a Bean to execute in, without assistance from Bean developers.
¨ EJB provides Distributed Transaction support
EJB provides transparency for distributed transactions. This means that a client can begin a transaction and then invoke methods on Beans present within two different servers, running on different machines, platforms or JVM.
¨ It helps create Portable and Scalable solutions
Beans conforming to the EJB API will install and run in a portable fashion on any EJB server.
Q.7.
A.7.HTTP is a "stateless" protocol which means each time a client retrieves a Web page, the client opens a separate connection to the Web server and the server automatically does not keep any record of previous client request.
Still there are following three ways to maintain session between web client and web server:
Cookies:
A webserver can assign a unique session ID as a cookie to each web client and for subsequent requests from the client they can be recognized using the recieved cookie.
This may not be an effective way because many time browser does not support a cookie, so I would not recommend to use this procedure to maintain the sessions.
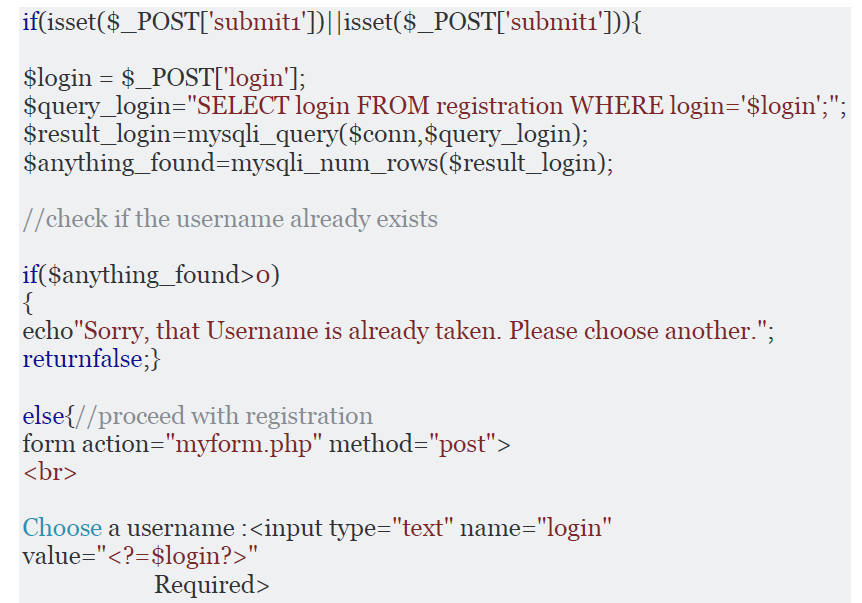
Hidden Form Fields:
A web server can send a hidden HTML form field along with a unique session ID as follows:
<input type="hidden" name="sessionid" value="12345">
This entry means that, when the form is submitted, the specified name and value are automatically included in the GET or POST data. Each time when web browser sends request back, then session_id value can be used to keep the track of different web browsers.
This could be an effective way of keeping track of the session but clicking on a regular (<A HREF...>) hypertext link does not result in a form submission, so hidden form fields also cannot support general session tracking.
URL Rewriting:
You can append some extra data on the end of each URL that identifies the session, and the server can associate that session identifier with data it has stored about that session.
For example, with http://tutorialspoint.com/file.htm;sessionid=12345, the session identifier is attached as sessionid=12345 which can be accessed at the web server to identify the client.
URL rewriting is a better way to maintain sessions and works for the browsers when they don't support cookies but here drawback is that you would have generate every URL dynamically to assign a session ID though page is simple static HTML page.
The HttpSession Object:
Apart from the above mentioned three ways, servlet provides HttpSession Interface which provides a way to identify a user across more than one page request or visit to a Web site and to store information about that user.
The servlet container uses this interface to create a session between an HTTP client and an HTTP server. The session persists for a specified time period, across more than one connection or page request from the user.
You would get HttpSession object by calling the public method getSession() of HttpServletRequest, as below:
HttpSession session = request.getSession();
You need to call request.getSession() before you send any document content to the client. Here is a summary of the important methods available through HttpSession object:
| S.N. | Method & Description |
|---|---|
| 1 |
public Object getAttribute(String name)
This method returns the object bound with the specified name in this session, or null if no object is bound under the name.
|
| 2 |
public Enumeration getAttributeNames()
This method returns an Enumeration of String objects containing the names of all the objects bound to this session.
|
| 3 |
public long getCreationTime()
This method returns the time when this session was created, measured in milliseconds since midnight January 1, 1970 GMT.
|
| 4 |
public String getId()
This method returns a string containing the unique identifier assigned to this session.
|
| 5 |
public long getLastAccessedTime()
This method returns the last time the client sent a request associated with this session, as the number of milliseconds since midnight January 1, 1970 GMT.
|
| 6 |
public int getMaxInactiveInterval()
This method returns the maximum time interval, in seconds, that the servlet container will keep this session open between client accesses.
|
| 7 |
public void invalidate()
This method invalidates this session and unbinds any objects bound to it.
|
| 8 |
public boolean isNew(
This method returns true if the client does not yet know about the session or if the client chooses not to join the session.
|
| 9 |
public void removeAttribute(String name)
This method removes the object bound with the specified name from this session.
|
| 10 |
public void setAttribute(String name, Object value)
This method binds an object to this session, using the name specified.
|
| 11 |
public void setMaxInactiveInterval(int interval)
This method specifies the time, in seconds, between client requests before the servlet container will invalidate this session.
|
Session Tracking Example:
This example describes how to use the HttpSession object to find out the creation time and the last-accessed time for a session. We would associate a new session with the request if one does not already exist.
/ Import required java libraries
import java.io.*;
import javax.servlet.*;
import javax.servlet.http.*;
import java.util.*;
// Extend HttpServlet class
public class SessionTrack extends HttpServlet {
public void doGet(HttpServletRequest request,
HttpServletResponse response)
throws ServletException, IOException
{
// Create a session object if it is already not created.
HttpSession session = request.getSession(true);
// Get session creation time.
Date createTime = new Date(session.getCreationTime());
// Get last access time of this web page.
Date lastAccessTime =
new Date(session.getLastAccessedTime());
String title = "Welcome Back to my website";
Integer visitCount = new Integer(0);
String visitCountKey = new String("visitCount");
String userIDKey = new String("userID");
String userID = new String("ABCD");
// Check if this is new comer on your web page.
if (session.isNew()){
title = "Welcome to my website";
session.setAttribute(userIDKey, userID);
} else {
visitCount = (Integer)session.getAttribute(visitCountKey);
visitCount = visitCount + 1;
userID = (String)session.getAttribute(userIDKey);
}
session.setAttribute(visitCountKey, visitCount);
// Set response content type
response.setContentType("text/html");
PrintWriter out = response.getWriter();
String docType =
"<!doctype html public \"-//w3c//dtd html 4.0 " +
"transitional//en\">\n";
out.println(docType +
"<html>\n" +
"<head><title>" + title + "</title></head>\n" +
"<body bgcolor=\"#f0f0f0\">\n" +
"<h1 align=\"center\">" + title + "</h1>\n" +
"<h2 align=\"center\">Session Infomation</h2>\n" +
"<table border=\"1\" align=\"center\">\n" +
"<tr bgcolor=\"#949494\">\n" +
" <th>Session info</th><th>value</th></tr>\n" +
"<tr>\n" +
" <td>id</td>\n" +
" <td>" + session.getId() + "</td></tr>\n" +
"<tr>\n" +
" <td>Creation Time</td>\n" +
" <td>" + createTime +
" </td></tr>\n" +
"<tr>\n" +
" <td>Time of Last Access</td>\n" +
" <td>" + lastAccessTime +
" </td></tr>\n" +
"<tr>\n" +
" <td>User ID</td>\n" +
" <td>" + userID +
" </td></tr>\n" +
"<tr>\n" +
" <td>Number of visits</td>\n" +
" <td>" + visitCount + "</td></tr>\n" +
"</table>\n" +
"</body></html>");
}
}
Q.8.
A.8.
The authentication mechanism is very useful when we try to access a protected web resource; at that time the web container activates the authentication mechanism that has been configured for that resource. A web client can authenticate a user to a web server using one of the following mechanisms:
- HTTP Basic Authentication
- HTTP Digest Authentication
- Form Based Authentication
- HTTPS Client Authentication
HTTP Basic Authentication:
HTTP basic authentication is defined by the HTTP specification that lightly sends the user's user name and password over the Internet as text that is uu-encoded (Unix-to-Unix encoded) but not encrypted. If someone can intercept the transmission, the user name and password information can easily be decoded. It should only be used with HTTPS, as the password can be easily captured and reused over HTTP. Basic authentication is supported by Exchange 2000 Server and Exchange Server 2003.
With basic authentication, the following things occur:
- A client requests access to a protected resource.
- The web server returns a dialog box that requests the user name and password.
- The client submits the user name and password to the server.
- The server validates the credentials and, if successful, returns the requested resource.

HTTP Digest Authentication:
Similar to HTTP Basic Authentication, HTTP Digest Authentication authenticates a user based on a username and a password. As Digest Authentication is not currently in widespread use, servlet containers are encouraged but NOT REQUIRED to support it. The advantage of this method is that the clear text password is protected in transmission; it cannot be determined from the digest that is submitted by the client to the server. Digested password authentication supports the concept of digesting user passwords. This causes the stored version of the passwords to be encoded in a form that is not easily reversible, but that the web server can still utilize for authentication.
The difference between basic and digest authentication is that on the network connection between the browser and the server, the passwords are encrypted, even on a non-SSL connection. Digested password is authentication based on the concept of a hash or digest. In this stored version, the passwords are encoded in a form that is not easily reversible and this is used for authentication.

Form Based Authentication:
Particularly Form-based authentication is not secure. The content of the user dialog box is sent as plain text, and the target server is not authenticated. This form of authentication can expose the user names and passwords unless all connections are over SSL. If someone can intercept the transmission, the user name and password information can easily be decoded. However, we can use an Exchange2003 Server front-end with an Exchange2000 Server back-end and benefit from forms-based authentication. Forms-based authentication is supported only by Exchange Server 2003.
With form-based authentication, the following things occur:
HTTPS Client Authentication:
Client-certificate authentication is a more secure method of authentication than BASIC or FORM authentication. It uses HTTP over SSL, in which the server and, optionally, the client authenticate one another using public key certificate. Secure Socket Layer (SSL) provides data encryption, server authentication, message integrity, and optional client authentication for a TCP/IP connection.

Similar to HTTP Basic Authentication, HTTP Digest Authentication authenticates a user based on a username and a password. As Digest Authentication is not currently in widespread use, servlet containers are encouraged but NOT REQUIRED to support it. The advantage of this method is that the clear text password is protected in transmission; it cannot be determined from the digest that is submitted by the client to the server. Digested password authentication supports the concept of digesting user passwords. This causes the stored version of the passwords to be encoded in a form that is not easily reversible, but that the web server can still utilize for authentication.
The difference between basic and digest authentication is that on the network connection between the browser and the server, the passwords are encrypted, even on a non-SSL connection. Digested password is authentication based on the concept of a hash or digest. In this stored version, the passwords are encoded in a form that is not easily reversible and this is used for authentication.
Form Based Authentication:
Particularly Form-based authentication is not secure. The content of the user dialog box is sent as plain text, and the target server is not authenticated. This form of authentication can expose the user names and passwords unless all connections are over SSL. If someone can intercept the transmission, the user name and password information can easily be decoded. However, we can use an Exchange2003 Server front-end with an Exchange2000 Server back-end and benefit from forms-based authentication. Forms-based authentication is supported only by Exchange Server 2003.
With form-based authentication, the following things occur:
- A client requests access to a protected resource.
- If the client is unauthenticated, the server redirects the client to a login page.
- The client submits the login form to the server.
- If the login succeeds, the server redirects the client to the resource. If the login fails, the client is redirected to an error page.

HTTPS Client Authentication:
Client-certificate authentication is a more secure method of authentication than BASIC or FORM authentication. It uses HTTP over SSL, in which the server and, optionally, the client authenticate one another using public key certificate. Secure Socket Layer (SSL) provides data encryption, server authentication, message integrity, and optional client authentication for a TCP/IP connection.
Execellent post with great information and thanks for sharing!!
ReplyDeletePHP Training in Pune
PHP Training in Hyderabad
Great work with lots of knowledgeable information and thanks for sharing!!
ReplyDeleteEthical Hacking Course in Hyderabad
Ethical Hacking Course in Kolkata
Great work with lots of knowledgeable information and thanks for sharing!!
ReplyDeleteDigital Marketing Course in Mumbai
Digital Marketing Course in Kolkata
Great work with lots of knowledgeable information and thanks for sharing!!
ReplyDeleteSwift Developer Course in Kolkata
Swift Developer Course in Hyderabad
Perfect post with amazing information and thanks for sharing!!
ReplyDeleteDATA Science Course in Pune
DATA Science Course in Kolkata
Great work with lots of knowledgeable information and thanks for sharing!!
ReplyDeleteDevOps Training in Pune
DevOps Training in Kolkata
Faboulse work with good content thanks for sharing!!
ReplyDeleteAWS Training in Pune
AWS Training in Hyderabad
AWS Training in Delhi
This post is so useful and informative. Keep updating with more information.....
ReplyDeleteDevOps Course in Bangalore
DevOps Training Bangalore
Indian Cyber Security Solutions presents EC Council Certified Ethical Hacker training in Hyderabad. Enhance your cybersecurity expertise and learn to counter cyber threats effectively. Enroll our comprehensive program and acquire the skills to become a certified ethical hacker.
ReplyDeleteGain cutting-edge cybersecurity skills with Certified Ethical Hacker training in Bangalore by Indian Cyber Security Solutions. Learn ethical hacking techniques, vulnerability assessment, and network defense to combat cyber threats. Join now and become a certified ethical hacker.
ReplyDeleteGreat resource for MCA 5th sem students! For those interested in advancing their tech skills, consider exploring Ethical Hacking Training in Hyderabad by Indian Cyber Security Solutions. Enhance your cybersecurity knowledge with expert guidance and hands-on experience. Learn more here: Ethical Hacking Training in Hyderabad.
ReplyDeletehttps://indiancybersecuritysolutions.com/ethical-hacking-training-in-hyderabad/
Indian Cyber Security Solutions offers top-notch Cyber Security Training in Hyderabad
ReplyDelete, providing hands-on learning and expert guidance to help professionals and students master cybersecurity skills. Highly recommended for those looking to build a strong career in cybersecurity!
Indian Cyber Security Solutions is a trusted Cloud Infrastructure Penetration Testing Service Provider in India
ReplyDeleteoffering expert security assessments to identify and fix vulnerabilities in cloud environments. Their industry expertise and advanced techniques ensure robust protection against cyber threats. Highly recommended for businesses prioritizing cloud security!
Indian Cyber Security Solutions is a top-rated Mobile App Penetration Testing Service Provider in India
ReplyDelete, offering expert security assessments to identify and mitigate vulnerabilities in mobile applications. Their advanced techniques and industry expertise ensure robust protection against cyber threats. Highly recommended for businesses looking to enhance their mobile app security!
Indian Cyber Security Solutions is a reliable API penetration testing service provider in India
ReplyDelete, offering expert-level testing to uncover vulnerabilities in REST, SOAP, and GraphQL APIs. Their certified team ensures thorough assessments and compliance-driven solutions to secure your digital infrastructure.